
05 — Space Preparation
Prepare Your Space
You do not need measurements to request a free initial review.
One room photo and a short note are enough to begin; the photo remains optional.
Prepare Your Space is the detailed second stage. Use it when you are ready to develop a project and want to document three useful measurements, five room views, fixed architectural details, and your companion's routines.
You do not need professional drawings. The free review helps establish whether there is a useful direction; this guide gives the studio the detail needed to develop it.
When you're ready
01 — Detailed stage
Submit your project brief
When ready, submit measurements, room views and notes in one place.
03 — Have a question?
Email the Studio
studio@byhaam.com — we'll talk it through directly.
Prefer to begin lightly? The free room review needs only a short note; a photo is optional. No video call required.
What HĀM needs first
The brief starts with four things.
Approximate measurements are enough for the first review. If anything is uncertain, send what you have.
01 — Three measurements
Width, height, and depth of the intended location.
02 — Five photographs
Straight-on, two angles, room context, fixed details.
03 — Fixed details
Outlets, skirting, doors, radiators, windows, beams.
04 — Companion routines
Body size, daily behaviours, what does not work today.
01 — The Essentials
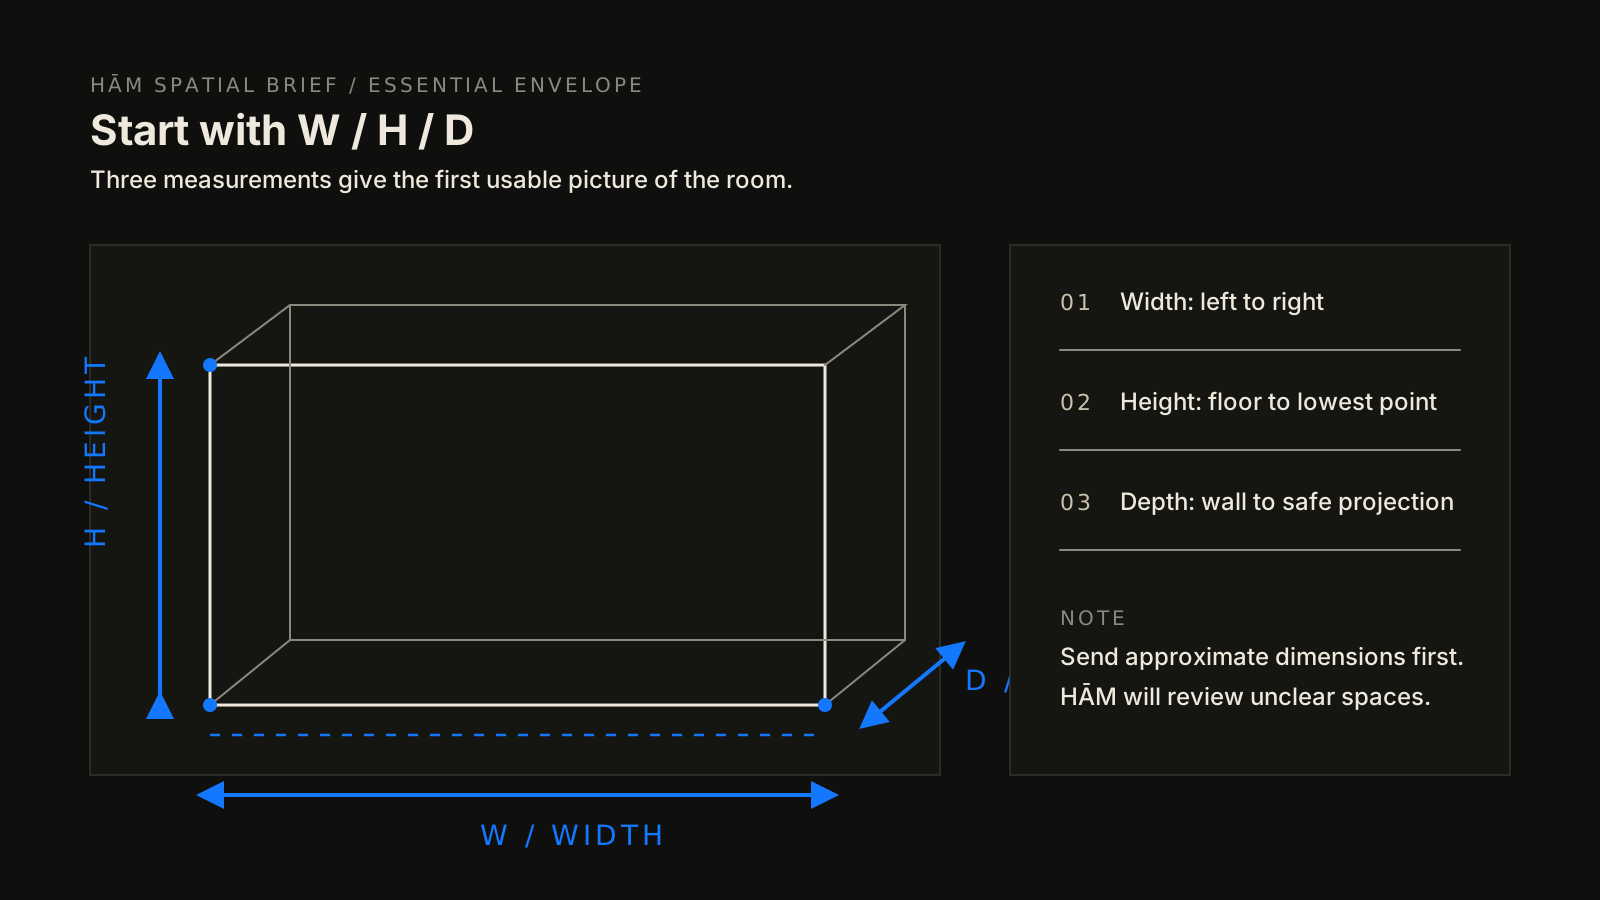
Start with W / H / D.
These three numbers define the first spatial envelope. They do not need to be perfect construction drawings. They simply help us understand what the room can hold.
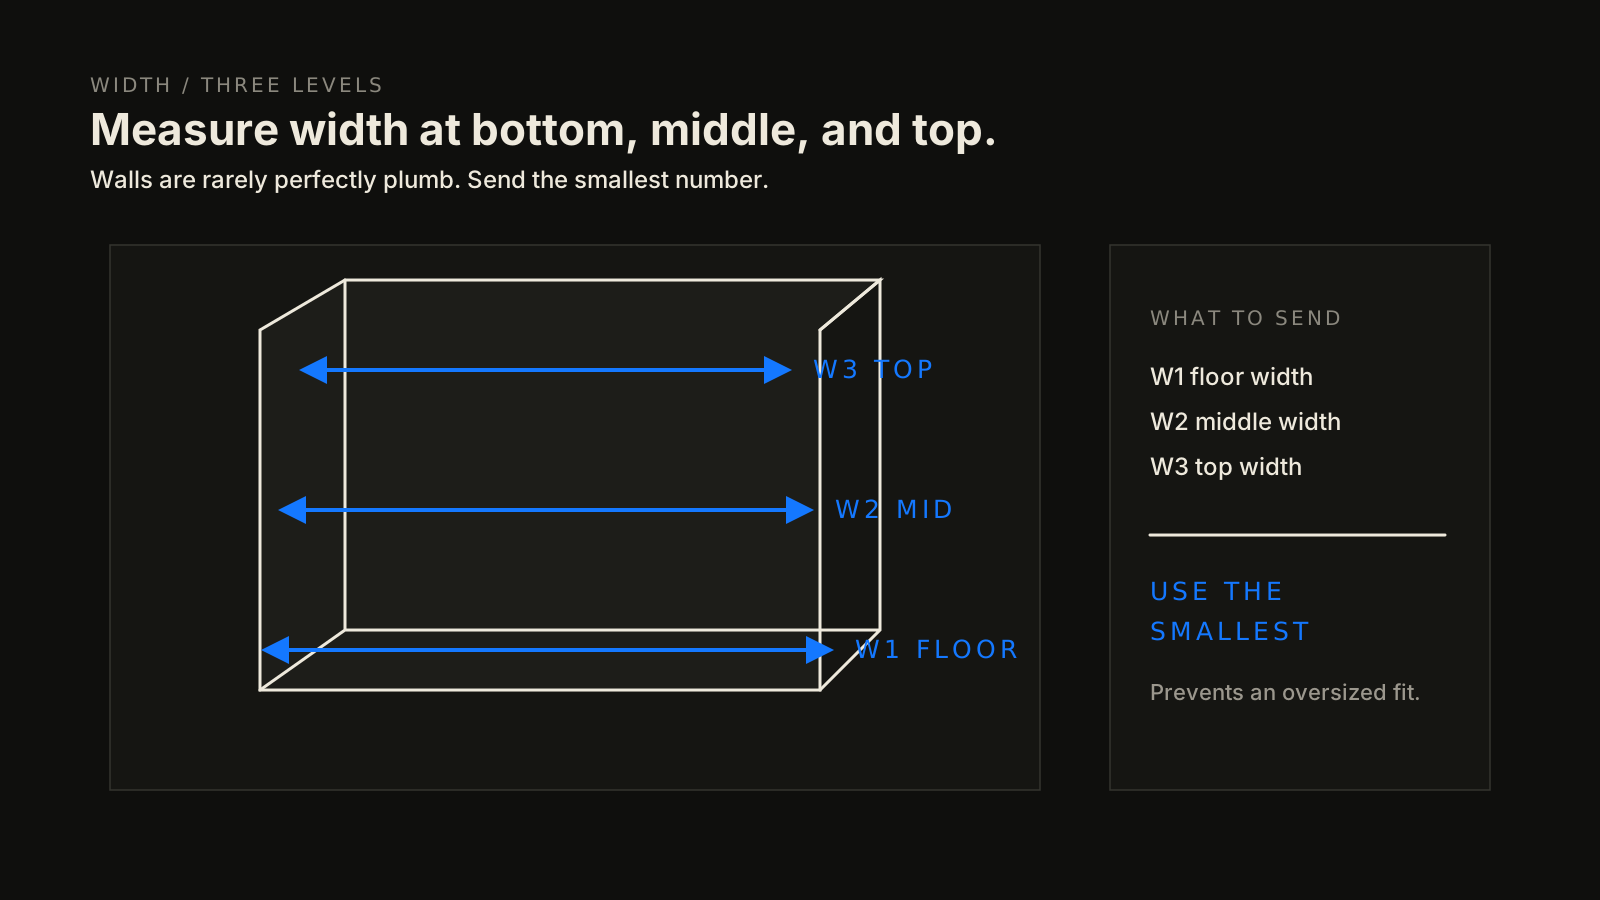
Measure width at three levels.
Walls are rarely perfectly plumb. Measure the width near the floor, at the middle of the intended height, and near the top.
What to send
Send all three numbers if you can. If you only send one, use the smallest measurement.
02 — Photographs
Photograph the space as if we were standing there.
Good photographs often tell us more than perfect measurements. Use natural light if possible. Stand far enough back to show the whole area.
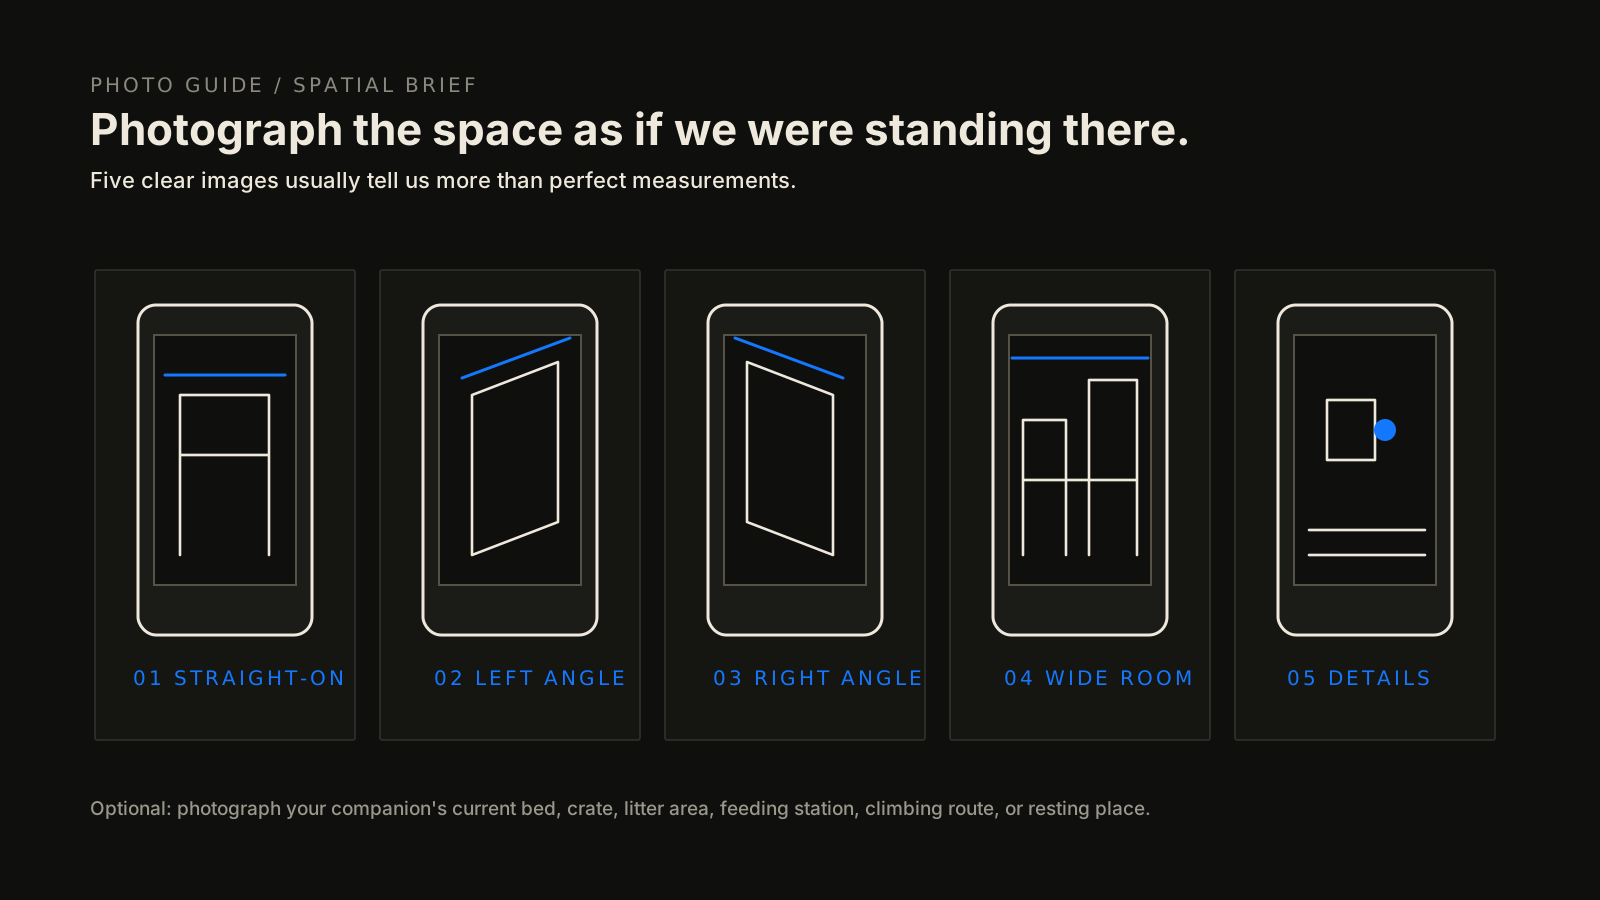
01
Straight-on view of the intended wall or corner
02
Left-side angle
03
Right-side angle
04
Wider room context showing circulation and nearby furniture
05
Close-up of outlets, skirting boards, vents, radiators, switches, or fixed obstacles
Optional: photograph your companion's current bed, crate, litter area, feeding station, climbing route, or resting place.
03 — Fixed Elements
Show us what the design must respect.
HĀM pieces are designed around the room, not forced into it. Fixed elements help us decide where the piece can attach, open, breathe, and remain safe.
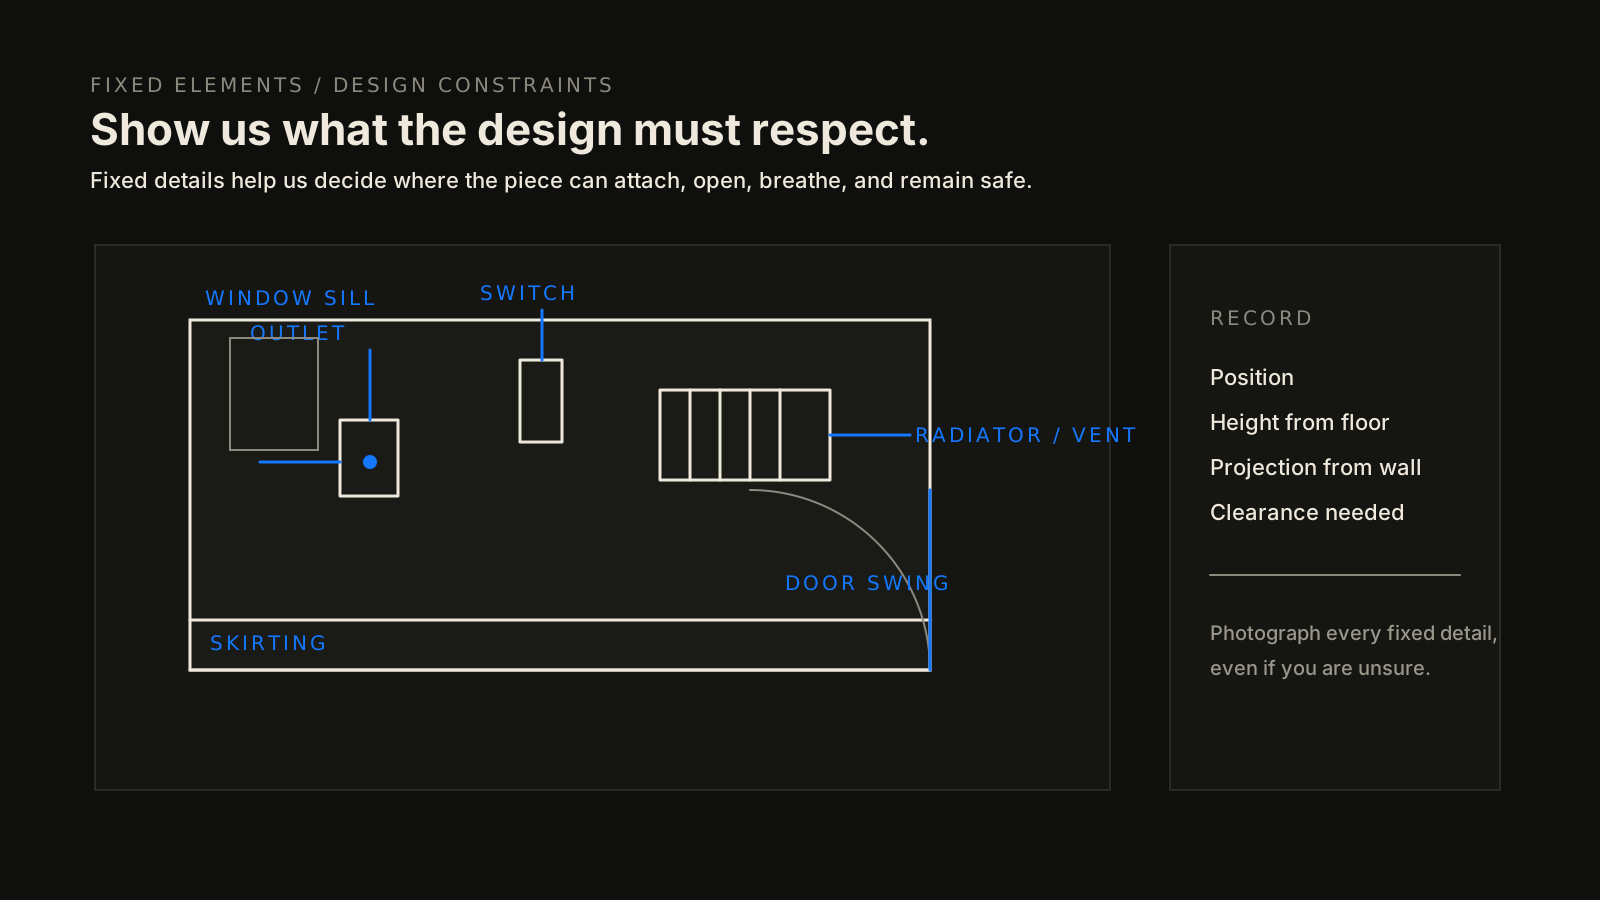
Outlets / switches
Measure from the nearest side wall and from the floor.
Skirting boards
Measure height and projection from the wall.
Doors / drawers / walkways
Show swing direction and clearance.
Radiators / vents
Photograph and measure the object, then note whether it produces heat or airflow.
Windows / curtains
Show sill height, frame depth, and curtain movement.
Sloped ceilings / beams
Measure the lowest point and photograph the angle.
04 — Your Companion
The room is only half the brief.
We design for the architecture of the home and the instincts of the animal living inside it. Whether you have a dog, a cat, or both — tell us about them.
Please describe
Species and breed, if relevant
Approximate weight and body length
Age and mobility
Where they rest now
Where they hide, climb, eat, scratch, dig, watch, or retreat
What currently does not work in the room
Whether the home includes more than one animal
05 — Common Mistakes
Avoid these four mistakes.
01
Measuring the old furniture instead of the empty space
Measure the room, not the object currently sitting there.
02
Forgetting doors, drawers, and walking paths
Depth is not only how far a piece can go. It is how far it can go without interrupting daily movement.
03
Measuring height only once
Floors and ceilings are rarely perfectly level. Measure at the front and back.
04
Hiding outlets and fixed details
If something exists on the wall, photograph it. We can design around it only if we know it is there.
06 — If This Applies
Complex spaces are normal.
Open only the items that apply to your room. If you are unsure, photograph the condition and include a short note.
After you submit
What happens next.
01
HĀM reviews your spatial brief
We check the measurements, photographs, companion details, and any fixed architectural constraints.
02
We identify what is missing
If anything is unclear, we reply with a short list of the exact photos or dimensions still needed.
03
We confirm the next design step
Once the space is clear enough, we guide you toward the appropriate Space Brief or commission pathway.
Ready when you are
You do not need to get everything perfect.
Send the clearest information you have. HĀM will help refine the rest.
Submit everything in one place using the project brief. No video call is required.
Measurements may be provided in millimetres, centimetres, or inches. Please specify which unit you are using. HĀM works in metric as standard; imperial measurements will be converted for review. For large files or upload errors, email studio@byhaam.com.